Steel Pens, Ruling Pens

A Steel Pen in a compass, Medium: watercolor.
I think that it’s fair to say that ruling pens, or steel pens, are a mystery to most people. This is not too surprising since they have been obsolete since about 1940. They were replaced for almost all uses by Rapidograph technical pens and their relatives. For the technical draftsman this was a good exchange; for the architect and artist it was not. Technical pens have some very serious limits on what they will feed. A ruling pen will feed anything that will drip, from water thin ink to shell gold and gouache. Some finesse is required, but they will do it.
Technical pens come in a wide range of line widths from hair fine to 1.5 mm or so. The problem is that you need 10 pens. They are not cheap, and they have a limited life, even if you can keep them from clogging beyond hope. A single ruling pen will replace ten technical pens. If you learn how to sharpen it, as shown below, it will last a lifetime.

About 100 years old, Freshly sharpened. Probably Kern, Switzerland.
Two or three major issues cause almost all of the problems with ruling pens. I will try to give enough information here to get an artist happily acquainted with a fine instrument.

About a century of pens from ~1880 to the end of production
Ruling pens come in a variety of shapes and sizes. Compass steel pens come in a couple of forms. The difference in names is strictly a functional thing; “ruling pens” and “curve pens” are used against a straight edge or curve. “Steel pens” are what they are called in compasses. They all work the same for the purposes of the discussion here. Almost all of the differences in appearance will center on how they open to clean.
A single very important difference is shown in the center pen above. It has a darker grey tip on the nibs. This is a tungsten carbide pen. It can only be sharpened with a diamond lap and they are very easy to chip. If you find one of those you will need some special sharpening tools.

The root of much unhappiness.
Pens only work when both nibs touch the paper.
French, Manual of Engineering Drawing, 1911. google books.
If I had to guess what single thing causes the most trouble with ruling pens, it would be the fact that steel pens only work well, or at all, if both nibs touch the paper. This involves two issues. They need to be properly shaped and sharpened to touch correctly and you need to be aware of how you are controlling the pen. We’ll get to shaping and sharpening below. For now, the issue is how the pen is held or mounted in the compass.
The ruling pen used against a straight edge is simple. The pen is held vertical relative to the ruler and tipped slightly in the direction of your pull.

Meet the “Inking Edge”
The pen sits vertical against the straight edge and at my comfortable angle for pull.
Notice that the straight edge is undercut. When the pen is vertical the nib is very close to the straight edge. The undercut avoids the disaster of ink running back under the straight edge.
(I will load a video of pens in use at the end of the post.)
Things are a bit more complex for a compass, but not much. The pen needs to be vertical, with both edges touching the paper but if it is fixed to a compass leg, the angle will change with every radius setting. There is some tolerance for this due to the give of the paper, but not much.

Knuckles.
The joints in the legs of a compass are called knuckles, and they exist mostly for the purpose of controlling the pen geometry to give a vertical pen.
The exact structure varies but they all have the same purpose. You set the pen up to your radius, and at vertical, before you “ink” it by adding a drop of ink.
The set up will change for every radius.
While mentioning the order of inking, it is worth noting that these pens carry much less ink than you think they need. They were designed for India ink which is about as thin as water. A load of 4 - 5 mm is plenty for a few circles and 6 mm is getting to be a large ink load. As you move to thicker media like thin gouache, you can try more media in the pen, it may feed better, but always start with less than you think you need.

Filling
Steel pens are never dipped to fill.
Pens fill well above the tip and run the media down to the tip. The function of the steel nibs requires them to be clean and dry on the outside so that they can control the flow of ink.
Luzadder, Fundamentals of Engineering Drawing, 1946
These were designed to give crisp lines and fine control of line weight for technical drawing. They do it superbly well. A short youtube clip shows it in action. They are quite smooth. It feels like a fiber tip pen. Until I get time to do a video tutorial, this YouTube educational film on the use of ruling and steel pens in technical drawing is the best I know of. Thanks to Mike Wyndham for the reference. Also check out a tutorial by Jeea Mirza on the ruling pen with common media..

Still, that is not their most impressive quality for artists.
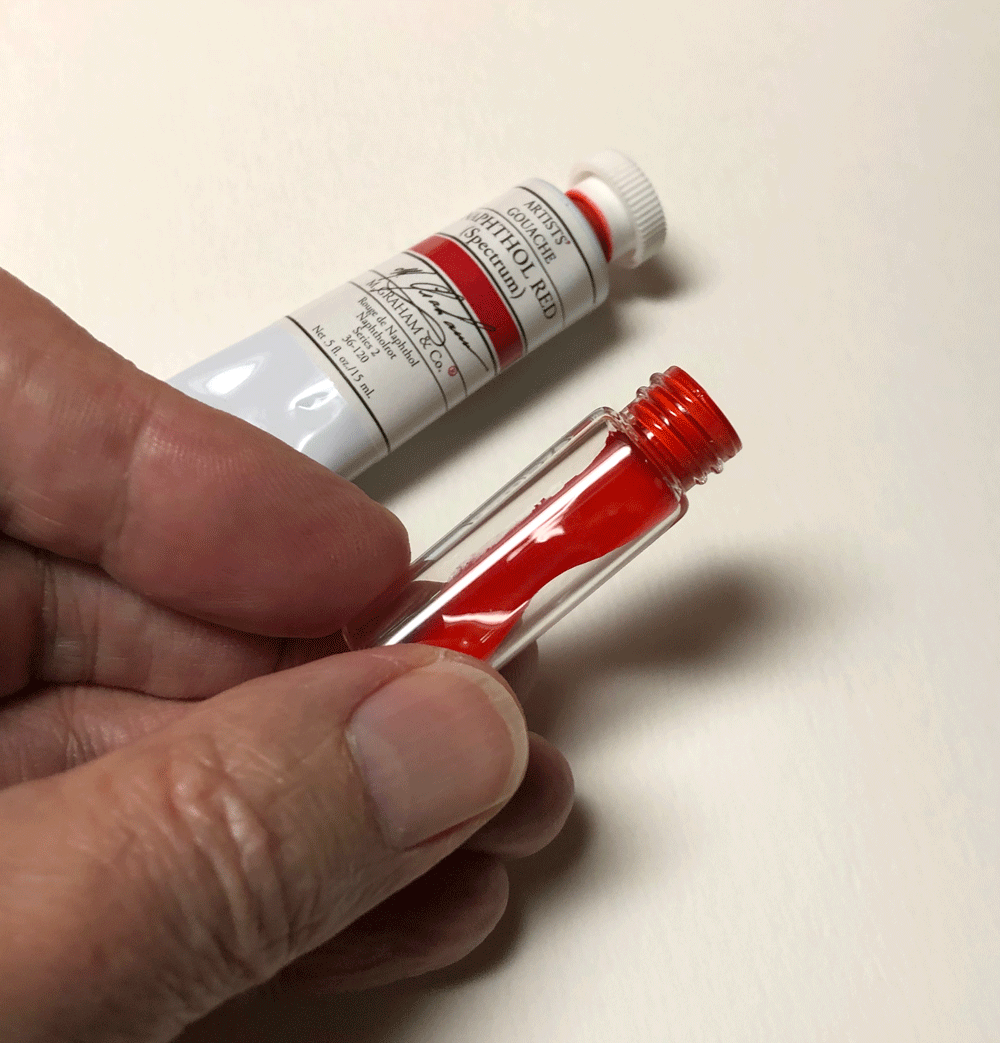
One of the strengths of the ruling pen is versatility in media. If it will drip, it will feed in a ruling pen. These are some experiments with media, but be adventurous.

Watercolor
Tube watercolor is easy. The paint is thinned until it will sheet reasonably thickly on the wall of a vial. I just used water.

Ruling Pen:
If I did this experiment again, I would start a bit thicker. The medium feeds very nicely in a pen and gives good color saturation.

Compass steel pen:
Results in the compass were also good but this is where I would have experimented with a bit more color in the mix. The thinnest line is not quite as saturated as I would like.
Watercolor is not much of a challenge since it is not very different in feel from ink, but still- it would not feed in a technical pen. Time for something a bit more challenging.
Gouache.
Gouache out of the tube isn’t going to flow in anything. It “slumps” but it doesn’t “drip.” We need drip.
This was thinned with 9:1 water : Acrylic Flow Improver from Winsor & Newton.

Candling.
The easiest way to judge the media dilution is “Candling” by diluting in a vial and holding a light under the vial.
Shake the vial and look for a thick opaque sheet.
The word comes form “candling eggs”.

Properly thinned to my preference.
The media should drain to an even, opaque, thin sheet. This should give good color saturation.

The only way to be sure of your dilution is to put a drop in the pen or the compass and strike a few arcs. You are looking for consistent starts and stops and nice color saturation. This is about right. I am striking arcs from right to left here.
The nice square starts are partly due to a well sharpened pen.

I need practice drawing with a pen, but this shows the media’s performance.
You can make a pen fail. I tried undiluted oil based primer in a pen. This is thick, very high solids oil based paint. (Rustoleum Primer for the American reader.) It started to give some skips in the line. If I had thinned this just slightly, even this would have worked well.

Everything has a limit.
I would have been amazed if this worked without thinning.
Now it’s time to address how to get a good pen. This means discussing sharp pens.
What Does Sharp Mean?
Nothing is as hard to explain as what a sharp pen means. You need to see one and use one to appreciate the difference it makes in a pen. You need a workshop session to see one sharpened and try your hand to master it. We will try to do it with a description and some short video clips.

What does Sharp look like?
First get a good magnifier and let’s look at some pens.

ThePictures worth 1,000 words…
This is the shape of a finely sharpened pen. Sadly, you cannot buy them like this today.
The pen profile from the top should be a smooth curve and the ends of the nibs should match exactly. If anything, this one has s slightly sharper than normal curve at the tip. They do not come to a point.
This is a Keuffel & Esser pen from the 1970s

From the side
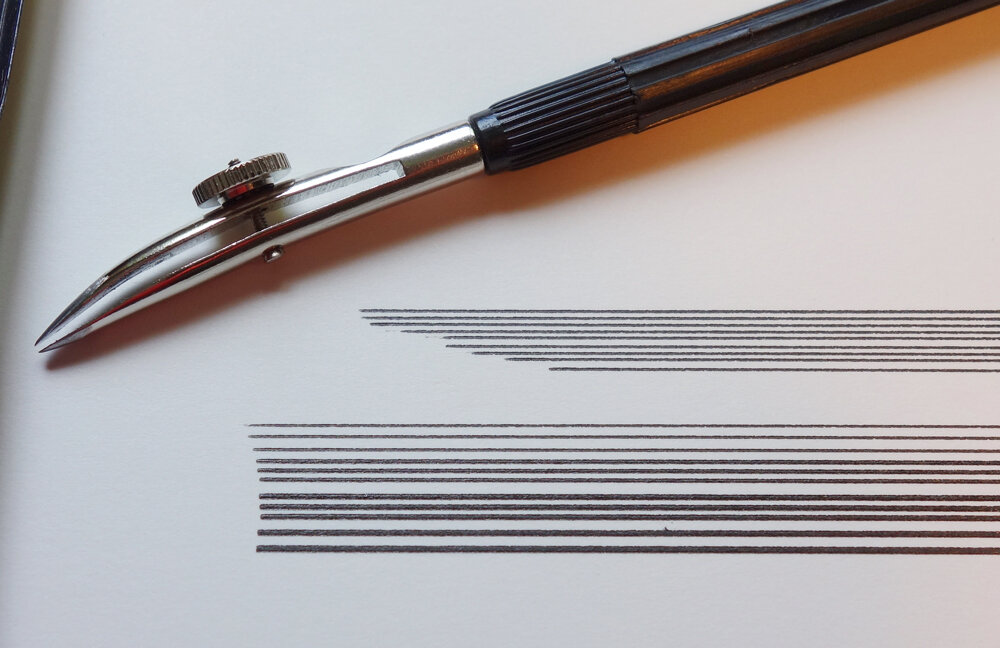
This is an excellent sharpening job. The last 4-5 mm of the nibs should be sharp edged but not quite sharp enough to cut the paper at the tip.
The pen controls the ink using the useful property that a liquid will not run around a sharp edge. So long as the two edges are sharp and the outside of the pen is dry, the nibs have absolute control over the ink or media.

Sadly… New Production
If you are lucky, this is what a current production pen will look like.
Purchased from Amazon 2019. This is a problem.
If you want good results form this pen, you need to fix it.
This pen will have two problems, even with thin India ink. It will be hard to cleanly start a line. It will be impossible to control the line width. Ink or media will run under and around the flat ground tip and give broad ragged lines. With thicker media it may not start a line at all. Let’s take a look at what you get out of the box and what a decent sharpening job can do.

Current offerings
As an example of current commercial offerings, meet a Jakar compass pen, $40. As received, this is junk. I do not have a macro shot of this one but it looked even worse than the new production example above. It starts poorly, at the left of the lines, the edges of the lines are ragged and uneven, and there is no control of line weight. This set of lines varies from completely closed to opened to typical use weight. This would be extremely frustrating to use.
Ground and sharpened.
The same pen after reshaping and sharpening. I spent 30 minutes on this one because it was such a mess. I have ground the nibs to a smooth dome shape so that I can easily shape and sharpen the edges and then I have shaped it to my liking and brought the edges to “almost knife sharp”. The lines are completely different.
The lines are now crisp and sharp edged. This is due to sharp nibs in good contact with the paper giving good control of the ink flow. Compare to “Before”.
Lines are cleanly started. Note that with a freshly sharpened pen for the broader lines the starts are actually square. They certainly are not blobs.
Line weight control is decent as the pen is screwed down. This is not great. I would spend another 20 minutes on this to get truly good line weight control if I intended to use it. The top series was just a series of lines pulled to test consistency and smoothness. Notice that it is not starting quite as cleanly as it should, and I should be able to get finer lines than this from a pen. It was so poor that I never intend to use it so I quit.

Where do you get a good pen?
If you can’t buy a new one of quality, buy a used pen and fix it.
This is an excellent Kern pen that was dropped. This is hopeless as it sits.

Step 1:
Grind to even the nibs and reshape.

After Step 1:
Reshaped but hopelessly dull edges.

Step 2:
Reshape and dome nib then bring the edges to sharp.
Ink, test, and refine.
Note that my pen sharpening job is not nearly as elegant as the job done by the master on the Keuffel & Esser. I am an amateur, but I can take a pen from unusable to very good in a half hour. A first class sharpening takes me all afternoon. It probably took an expert 20 minutes.
Once upon a time, you took this to a drafting supply house and they sent it out to be sharpened for a few dollars. That service is gone. You need to be your own expert on this one. Fortunately it is not that hard. If you are comfortable sharpening a knife, this does not take long after about 3 or 4 practice sessions. You need a whetstone, preferably a hard Arkansas stone, or diamond plates. You need a loupe. You need the adventurous spirit to give it a try. Spend not very much money for a nasty looking pen on ebay or at the junk shop and give it a go. Work slowly and it is not incredibly difficult.

Cleaning… and Pen Design
Steel pens are designed for ink, which was corrosive until recently. Cleaning was important. If you use heavier media in a pen, cleaning is very important.
Technical drawing has a vocabulary of line weights. You needed pens set to specific line weights at hand through the day. Most people set their pens for their desired line weights and then they want them to stay set. These designs allow the pen to be opened for cleaning without changing line weight. This is very nice for heavy media or very complex artwork where you may want to clean the media out before completing the work. All of these work, some are much nicer than others.

Cross Hinged, Kreuzsharnier.
Cross hinged pens work very well. It is easy to open them without disturbing line settings. This pen was still sold until 2020 by Gebrüder Haff as the Kreuzscharnier pen. The price was good for the quality. Look for it used. These are still sold by some Chinese manufacturers. These pens tend to have some issues (I’m being polite). If you buy one of these you need to be sure that the botom nib returns to exact center when you close the pen back up. It will cause serious problems if it does not. If you buy one and it does not index back to center well, I would send it back. All of the new production pens will need to be sharpened before they will give decent results.

Jack Knife Pens
Jack knife pens are generally the easiest to clean and were always the most expensive pens. They are usually very nice steel. These would be used purchases only and expect them to sell at premium prices. Many of the fine antique pens are hinged to open similarly.

Flip tabs
Probably the most common quick opening pens are these with a tab flipped to the side to open the pen. The problem is that the quick release is sitting against the bottom of the adjustment screw, With practice, and a tight hold on the adjustment screw, these work but they are definitely not my favorites.
Some Specialist pens

Border and Broad Pens
Standard ruling pens and steel compass pens are designed for the line weights used in technical drawing. These seldom exceed 0.75 mm. For art work, something a bit heavier might be nice. Their other limit is that they are not designed to hold a huge amount of medium. This is not generally a problem for ink. A little ink draws a lot of line. For thick media like gouache, the pen will lay down much more media on the line and the capacity of the pen becomes a bit of an irritation. These two are the solutions for these two issues.
The top pen is a “border pen” used for drawing custom borders on architectural renderings. For some reason it is called a Swedish pen in the United States. No one knows why. It does not draw a thicker line, it holds more ink and draws a much longer line of the standard weights. It can be pushed up to a bit under 1mm.
The bottom pen is a thick line pen. It is essentially two back to back pens. It will just about double the line width. For some reason these were still made very recently in Japan. This is a new pen of reasonably good quality. If you know of a contact in Japan, it might be worth enquiring. They are known there as English style instruments.

Standard pen line weights and Broad Pen line weights.

The bottom two are two further specialist pens. The typical ruling pen at the top is designed to do one thing. It is used against a straight edge to draw a straight line. It does it very well. It is not designed to be used free hand or against a curve. The center pen with the curved nib is designed to follow curves against a French curve. The knob on the left adjust the tension from free swiveling to fixed to fit your preferences. These can be used free hand with some practice. These are normally stainless steel as for a normal pen. This one is a tungsten carbide pen; it can be identified by the gray nose to the nibs. These are wonderful pens that stay sharp for a very long time but they need special care. These are somewhat more common than ruling pens in tungsten since they are slower to sharpen.
The bottom example is an extreme example of a high ink capacity border pen. Older pens are usually high carbon steel and take a brown patina. This is fine if the edges are not pitted.

Did I mention that they are elegant and beautiful?

Again a warning:
This is a tungsten carbide tip pen. They’re wonderful and they stay sharp forever but you cannot sharpen them without diamond laps. Handle them with care, they chip easily.
This discussion of sharpening needs some short video clips. I find videos slow and painful to produce, particularly for the shots needed for this discussion. It may take a week or so for videos to appear.